- In Windows 10 PC, you have C: drive which contains all program files, in addition, it also has all your saved word documents, photos, and your important files. If your operating system becomes corrupted in case of the worst scenario, then all your important files will get lost.
- To avoid such data loss and to keep your most important files separate, we will go for a separate space from your C: drive using a partition. By doing this, even if your operating system gets corrupt, we will likely be able to get all your important files safely.
- It is always safer and best practice to put your personal files or important files on a different partition.
- This blog post demonstrates how easily we can partition the C: drive using a built-in disk manager in windows 10.
Video Tutorial:
Step 1: Open Disk Management
- Type 'Disk Management' in the start menu's search bar and select "Create and format hard disk partitions - control panel".
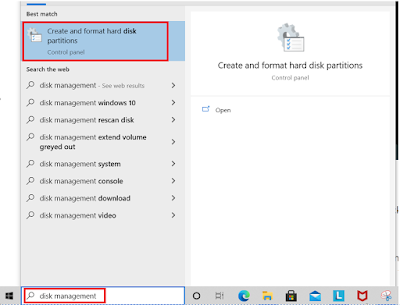 |
| Search 'Disk Management' in the search bar of the start menu |
- Or, Open Run utility (Windows key + R), Type 'diskmgmt.msc' and press 'ok'.
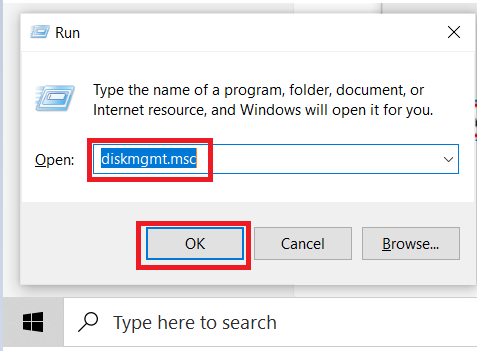 |
| 'diskmgmt.msc' in Run utility |
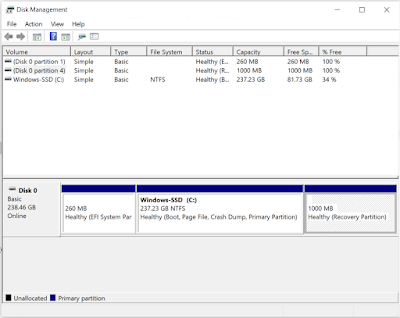 |
| Disk Management built-in tool |
Step 2: Shrink C: drive - Right-click on the drive you want to partition and select "Shrink Volume".
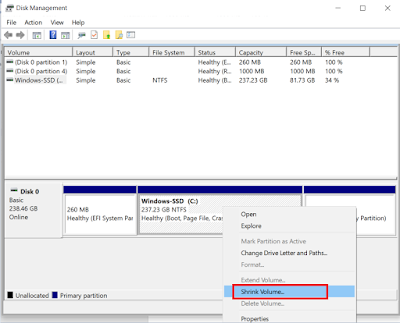 |
| Shrink Volume |
- Enter the amount of space you want to shrink in MB and click Shrink. "Total size after shrink" will be the space left in C: drive after shrink.
Step 3: Add unallocated space to a new partition - Now, right-click on the unallocated space and select 'New Simple Volume'.
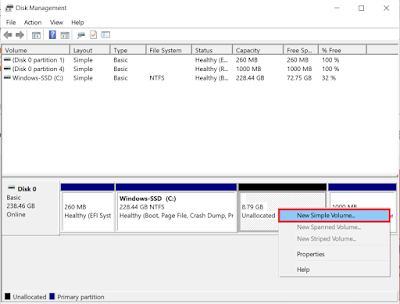 |
| New Simple Volume |
- In New Simple Volume Wizard, follow the instructions, enter the specified size and assign a drive letter for the new volume.


No comments:
Post a Comment